
As the Social Media Manager and Content Strategist for the Ace Rogers brand, I developed and executed a multi-platform content system across Instagram and Facebook, focused on audience growth and conversion, while managing a small creative team of three.
Over 11 months, I scaled the brand from approximately 83,000 to 250,000+ followers, averaging 15,000+ new followers per month. During this time, I produced multiple high-performing content formats, with 11 videos surpassing 1 million views, including several that reached multi-million-view counts.
In parallel, I expanded the brand’s presence on Facebook, growing the account from 2,000 to nearly 30,000 followers by adapting content strategies to platform-specific behavior and distribution.
Beyond audience growth, I implemented systems to capture and convert attention—building an email list of over 3,000 subscribers in preparation for a digital product launch. This allowed social media traffic to transition into owned audience channels, supporting long-term marketing and monetization efforts.
I built a repeatable system to identify and scale high-performing content, and aligned that growth with conversion-focused initiatives that supported recruiting and business objectives.
SOCIAL GROWTH EXECUTION
Story Testing to Viral Reel Execution
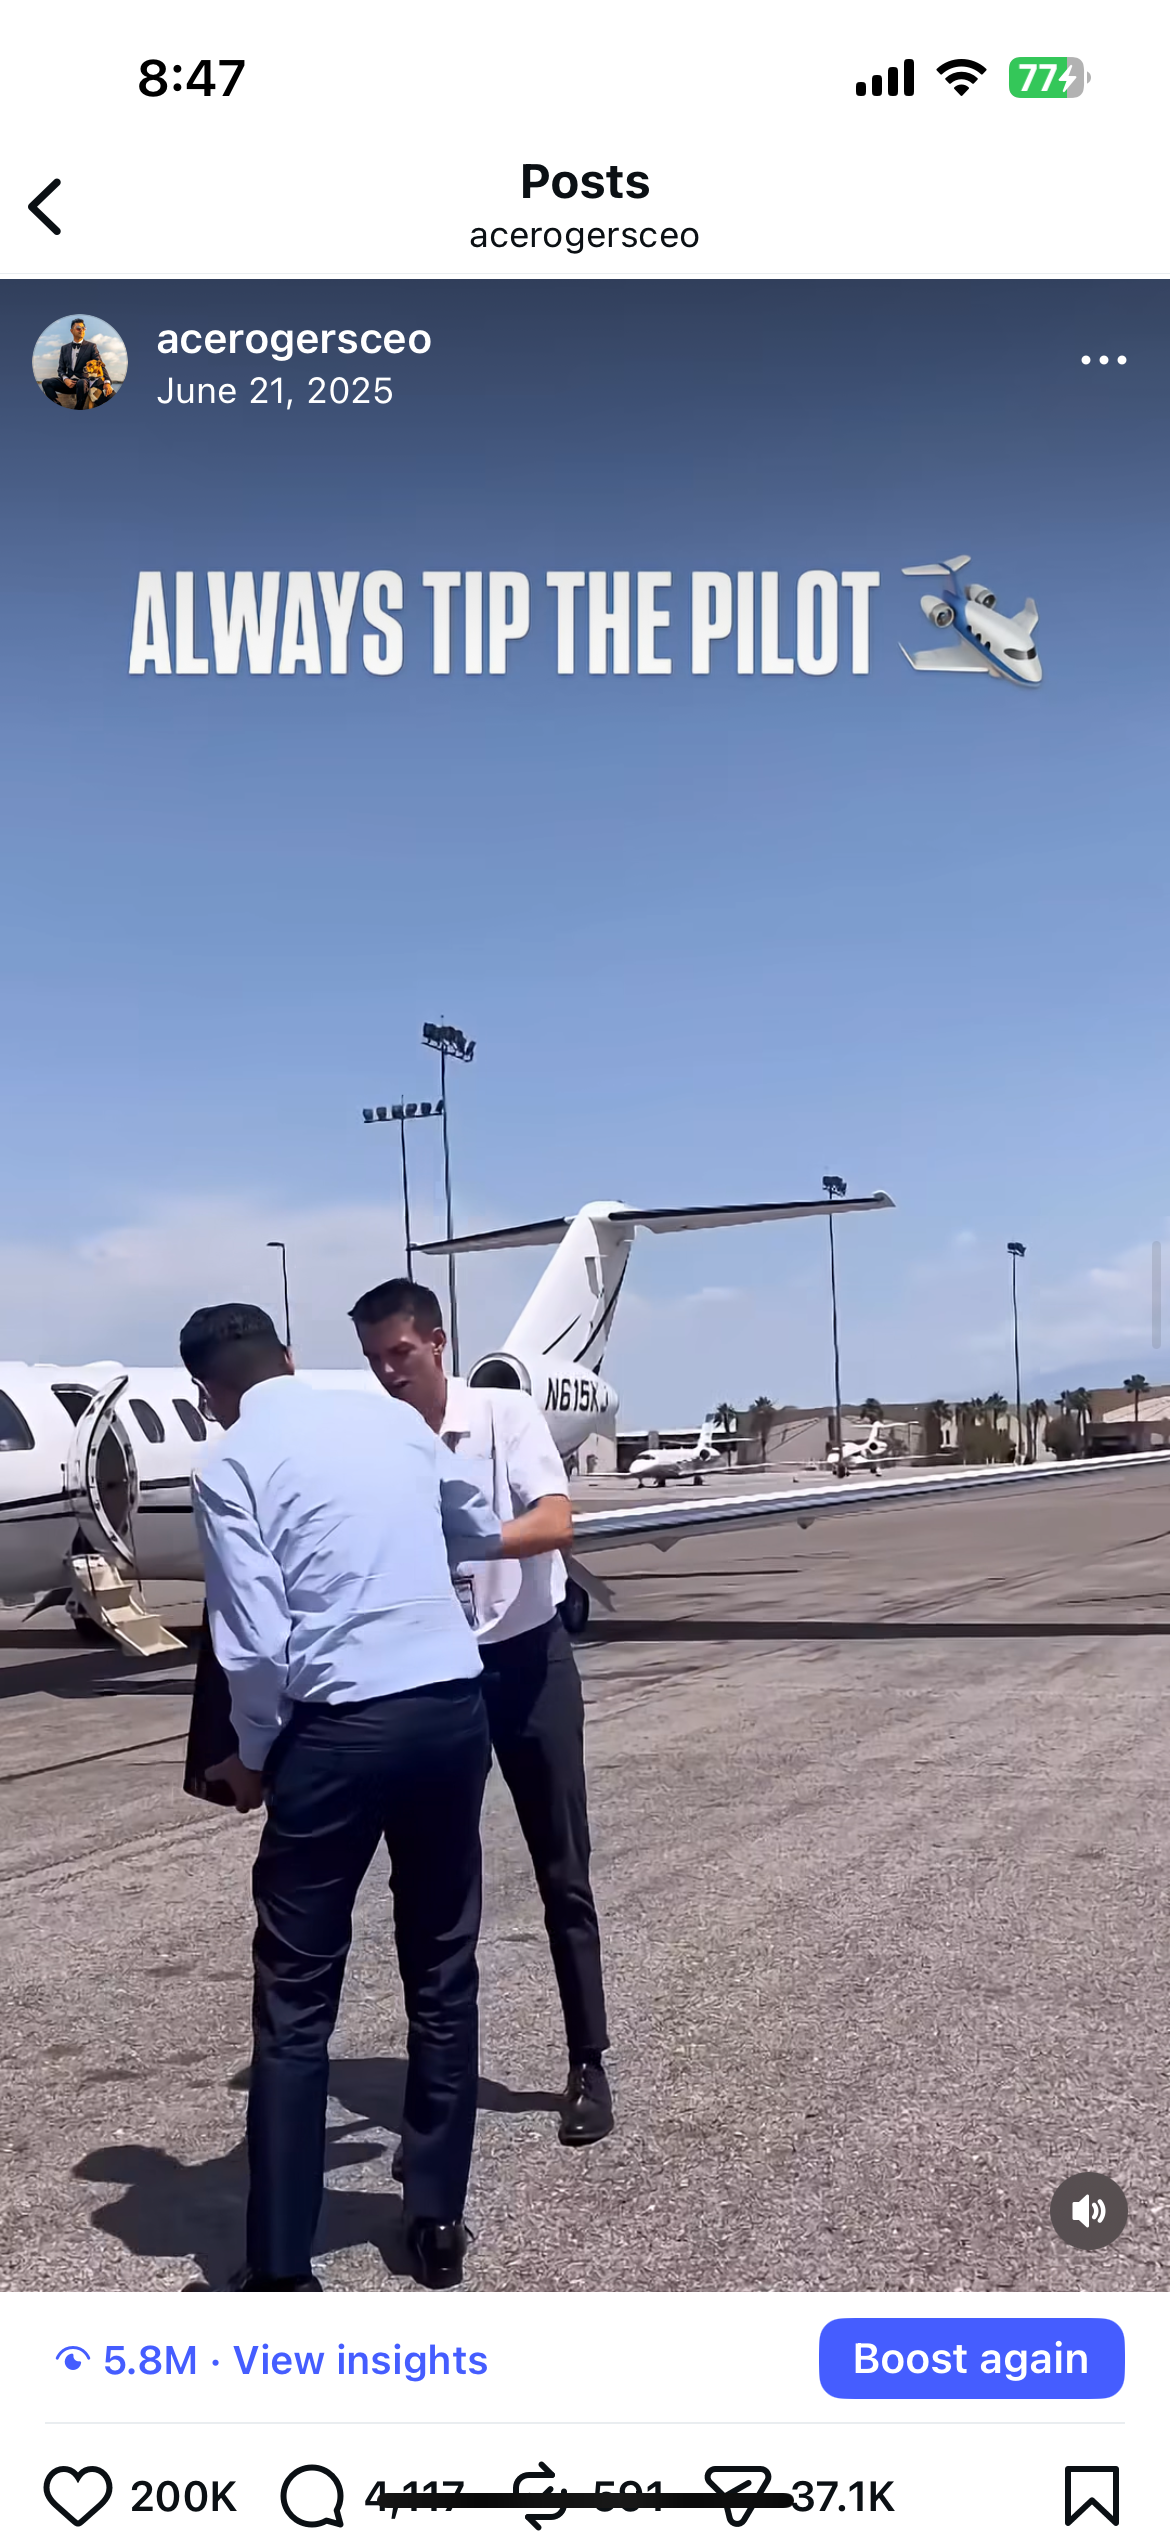
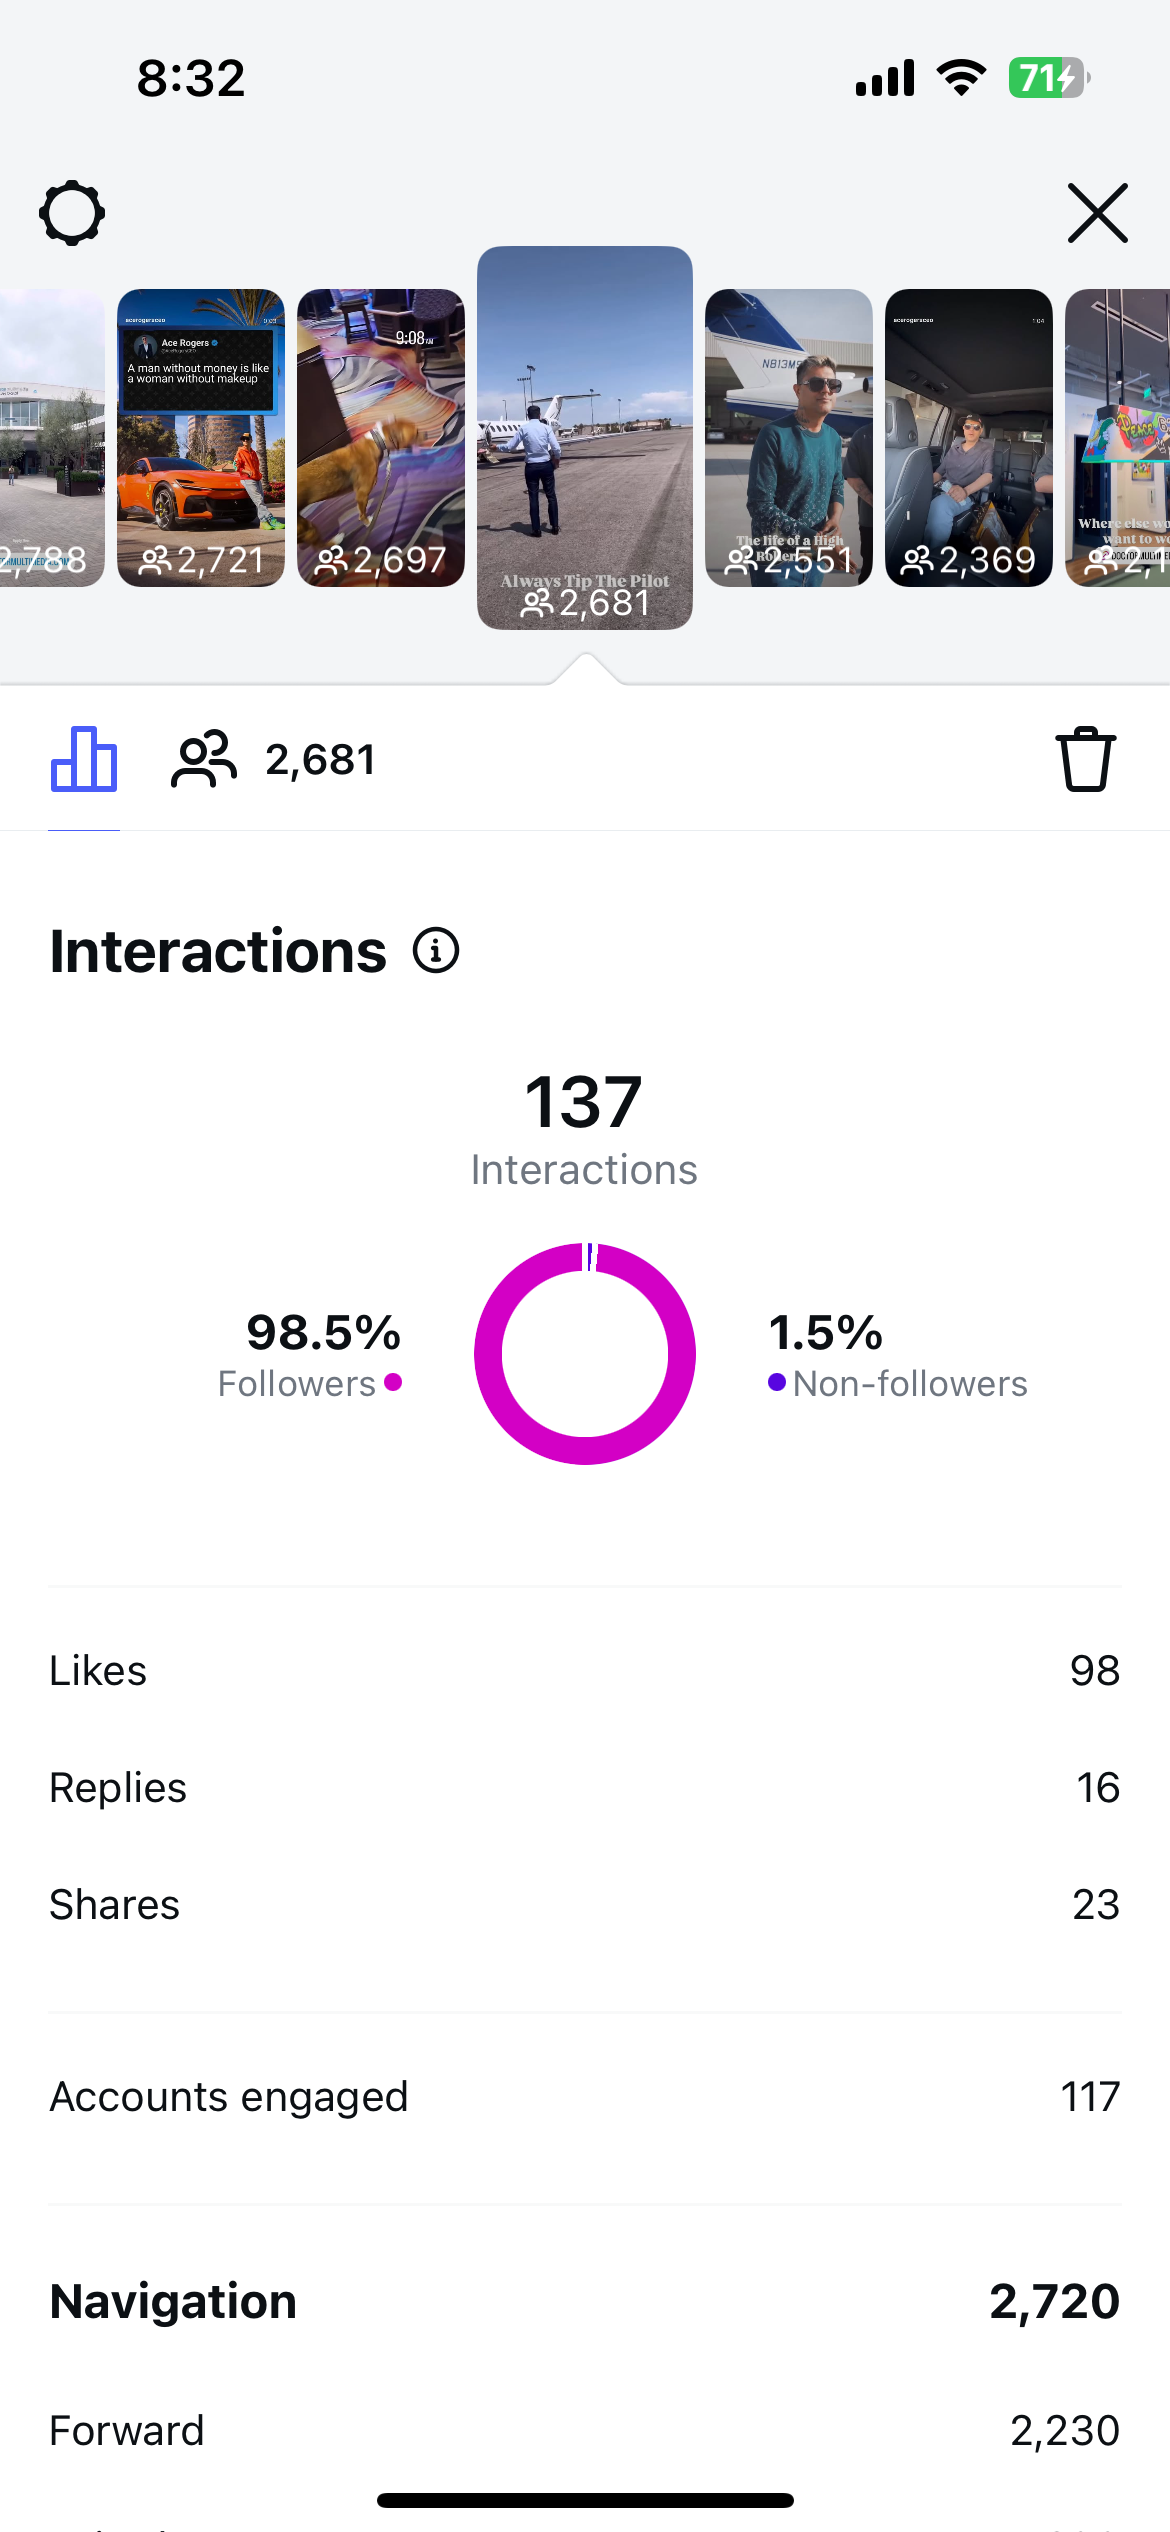
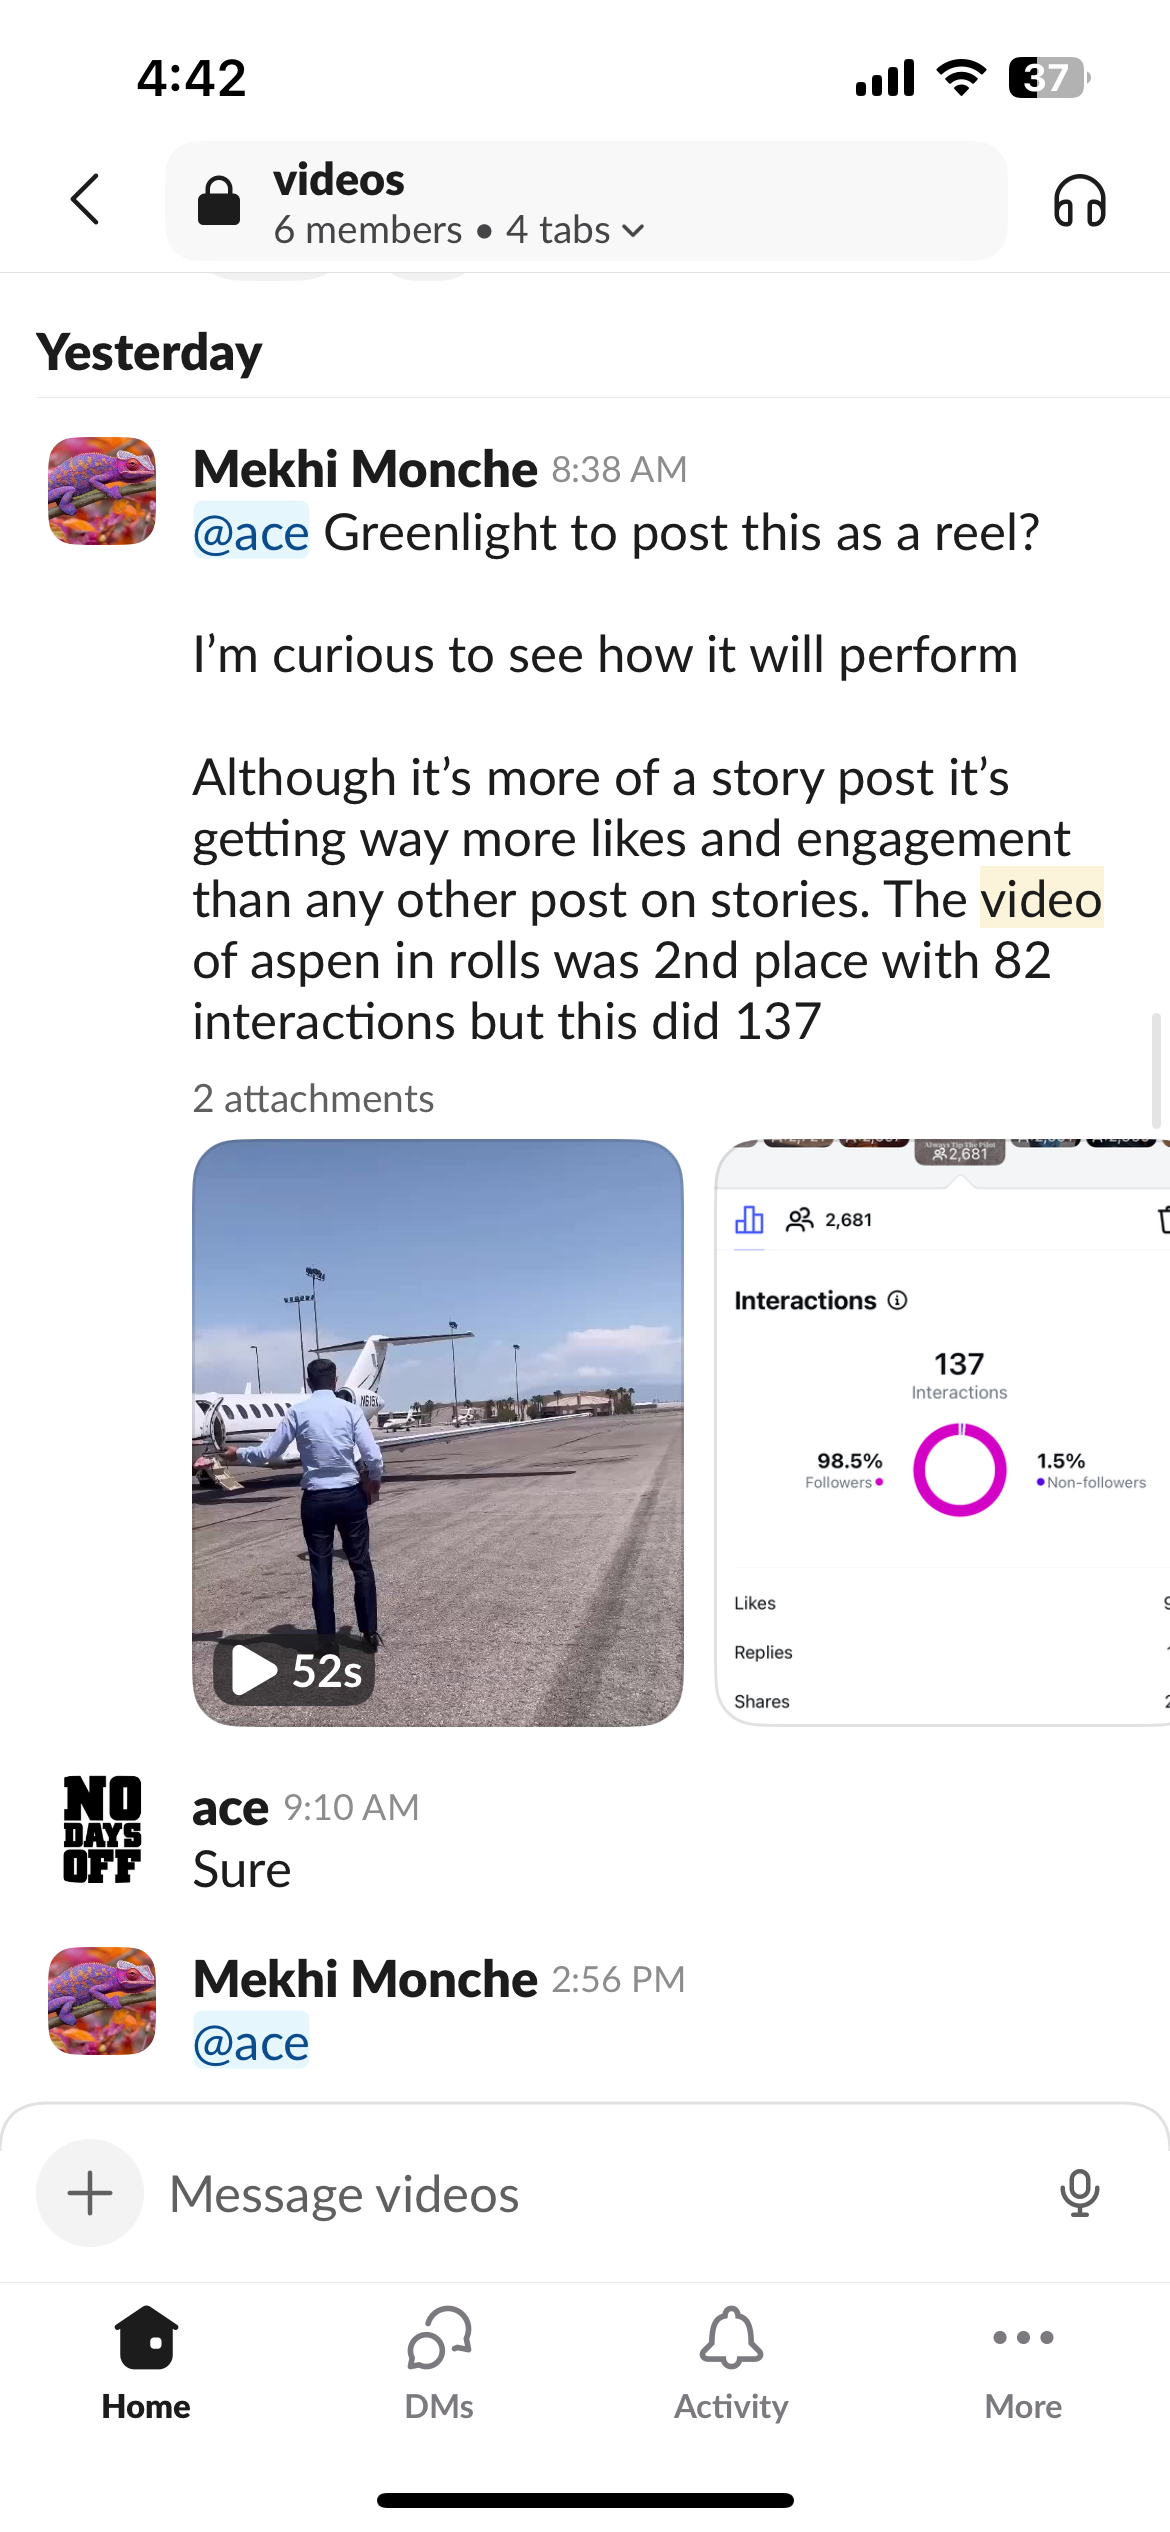
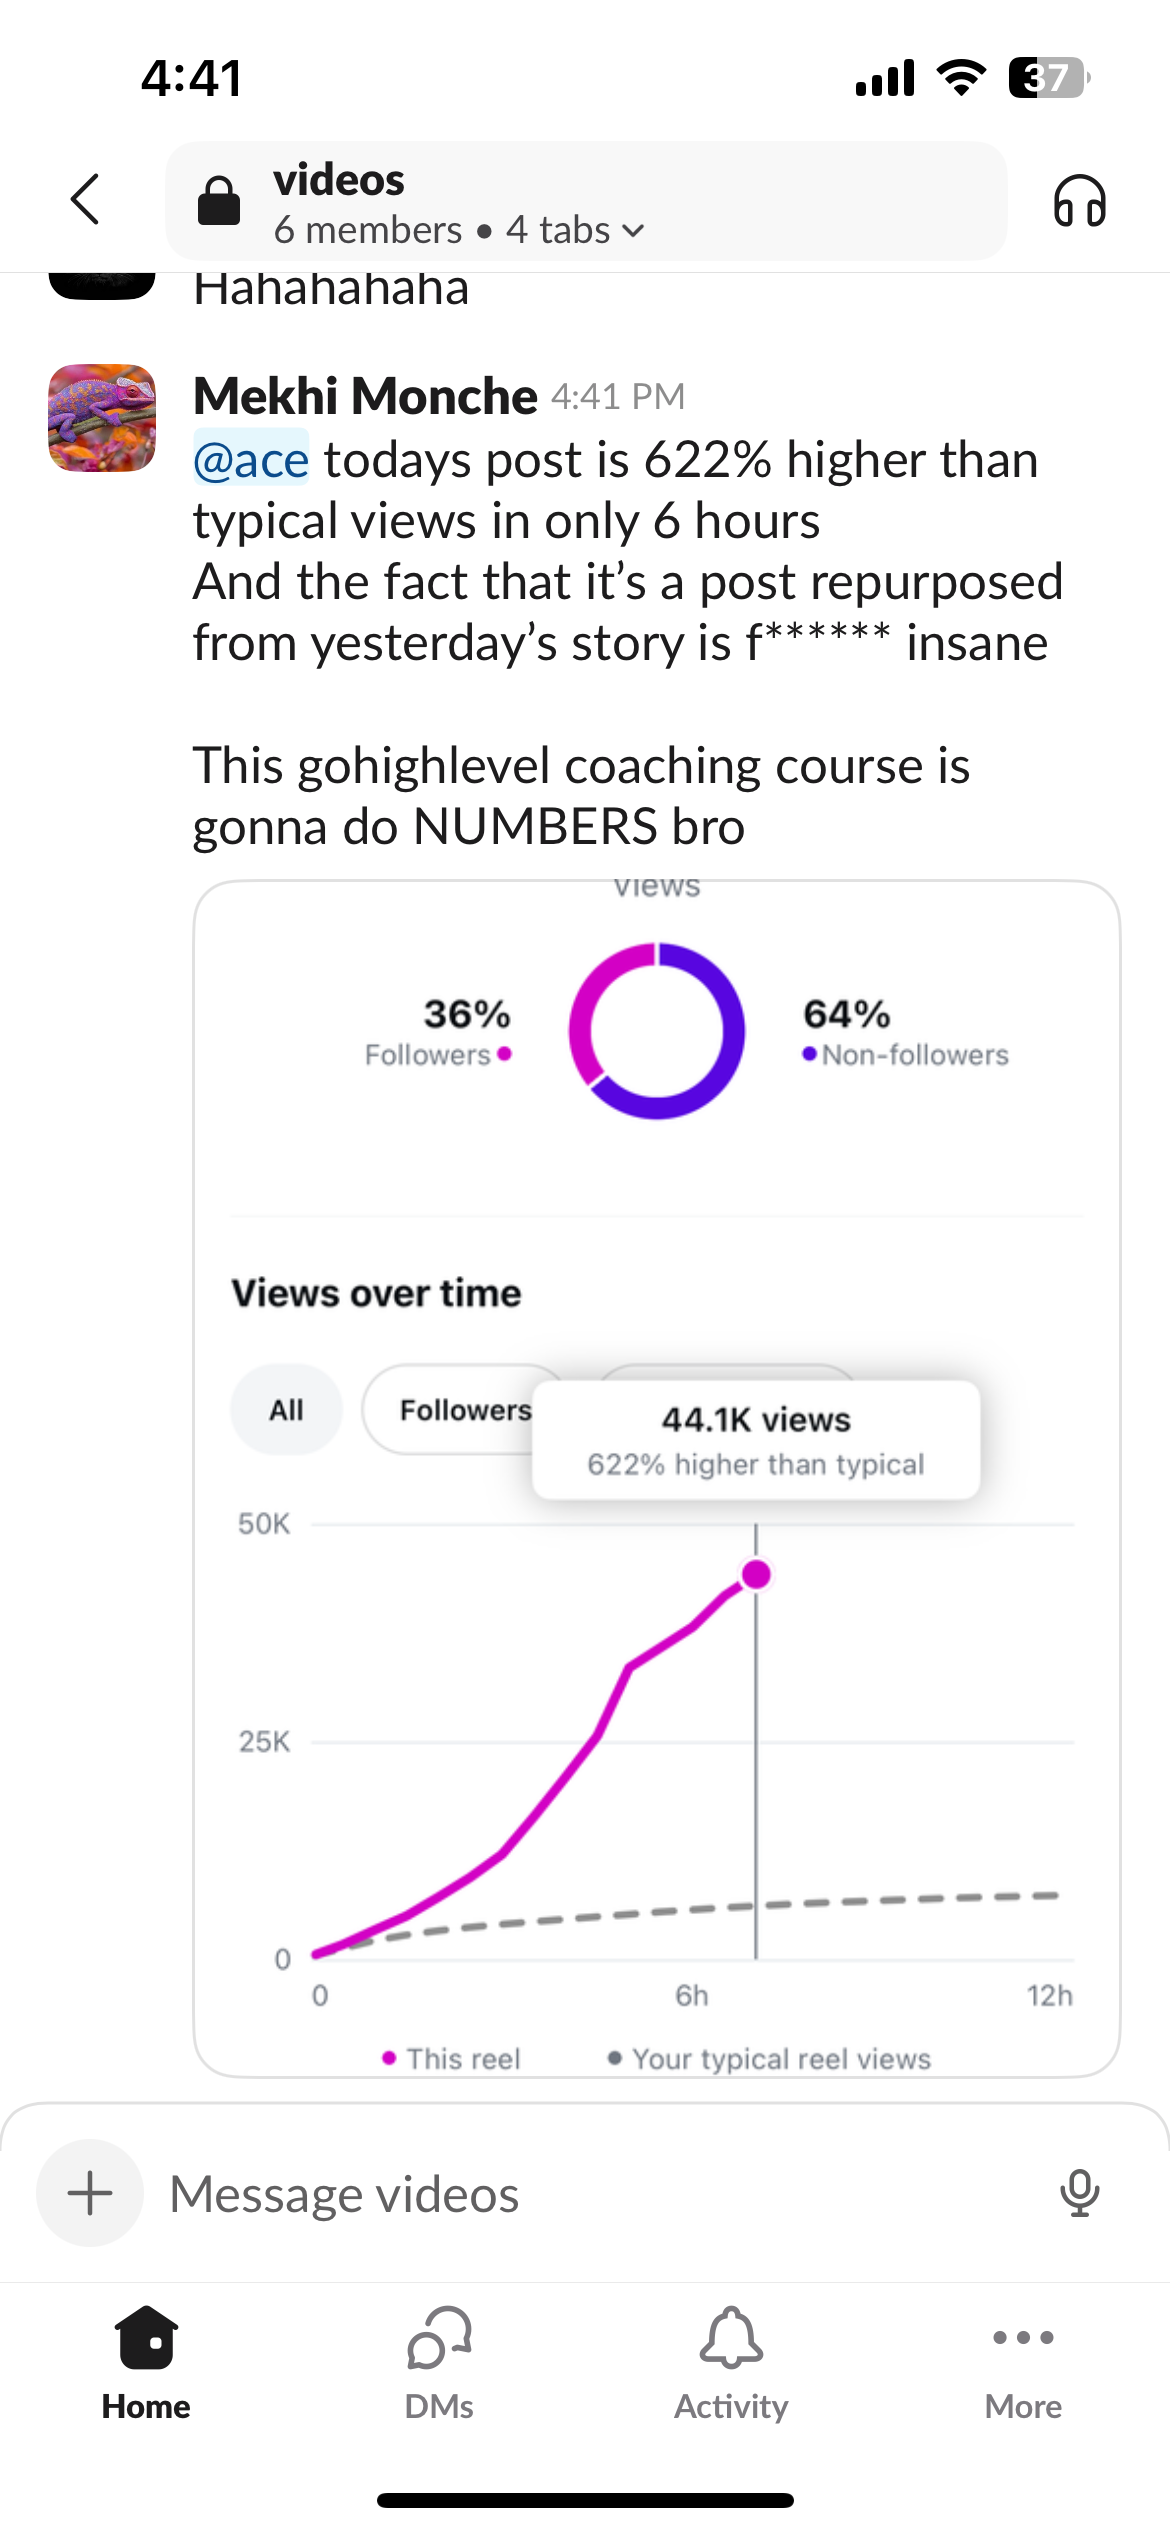
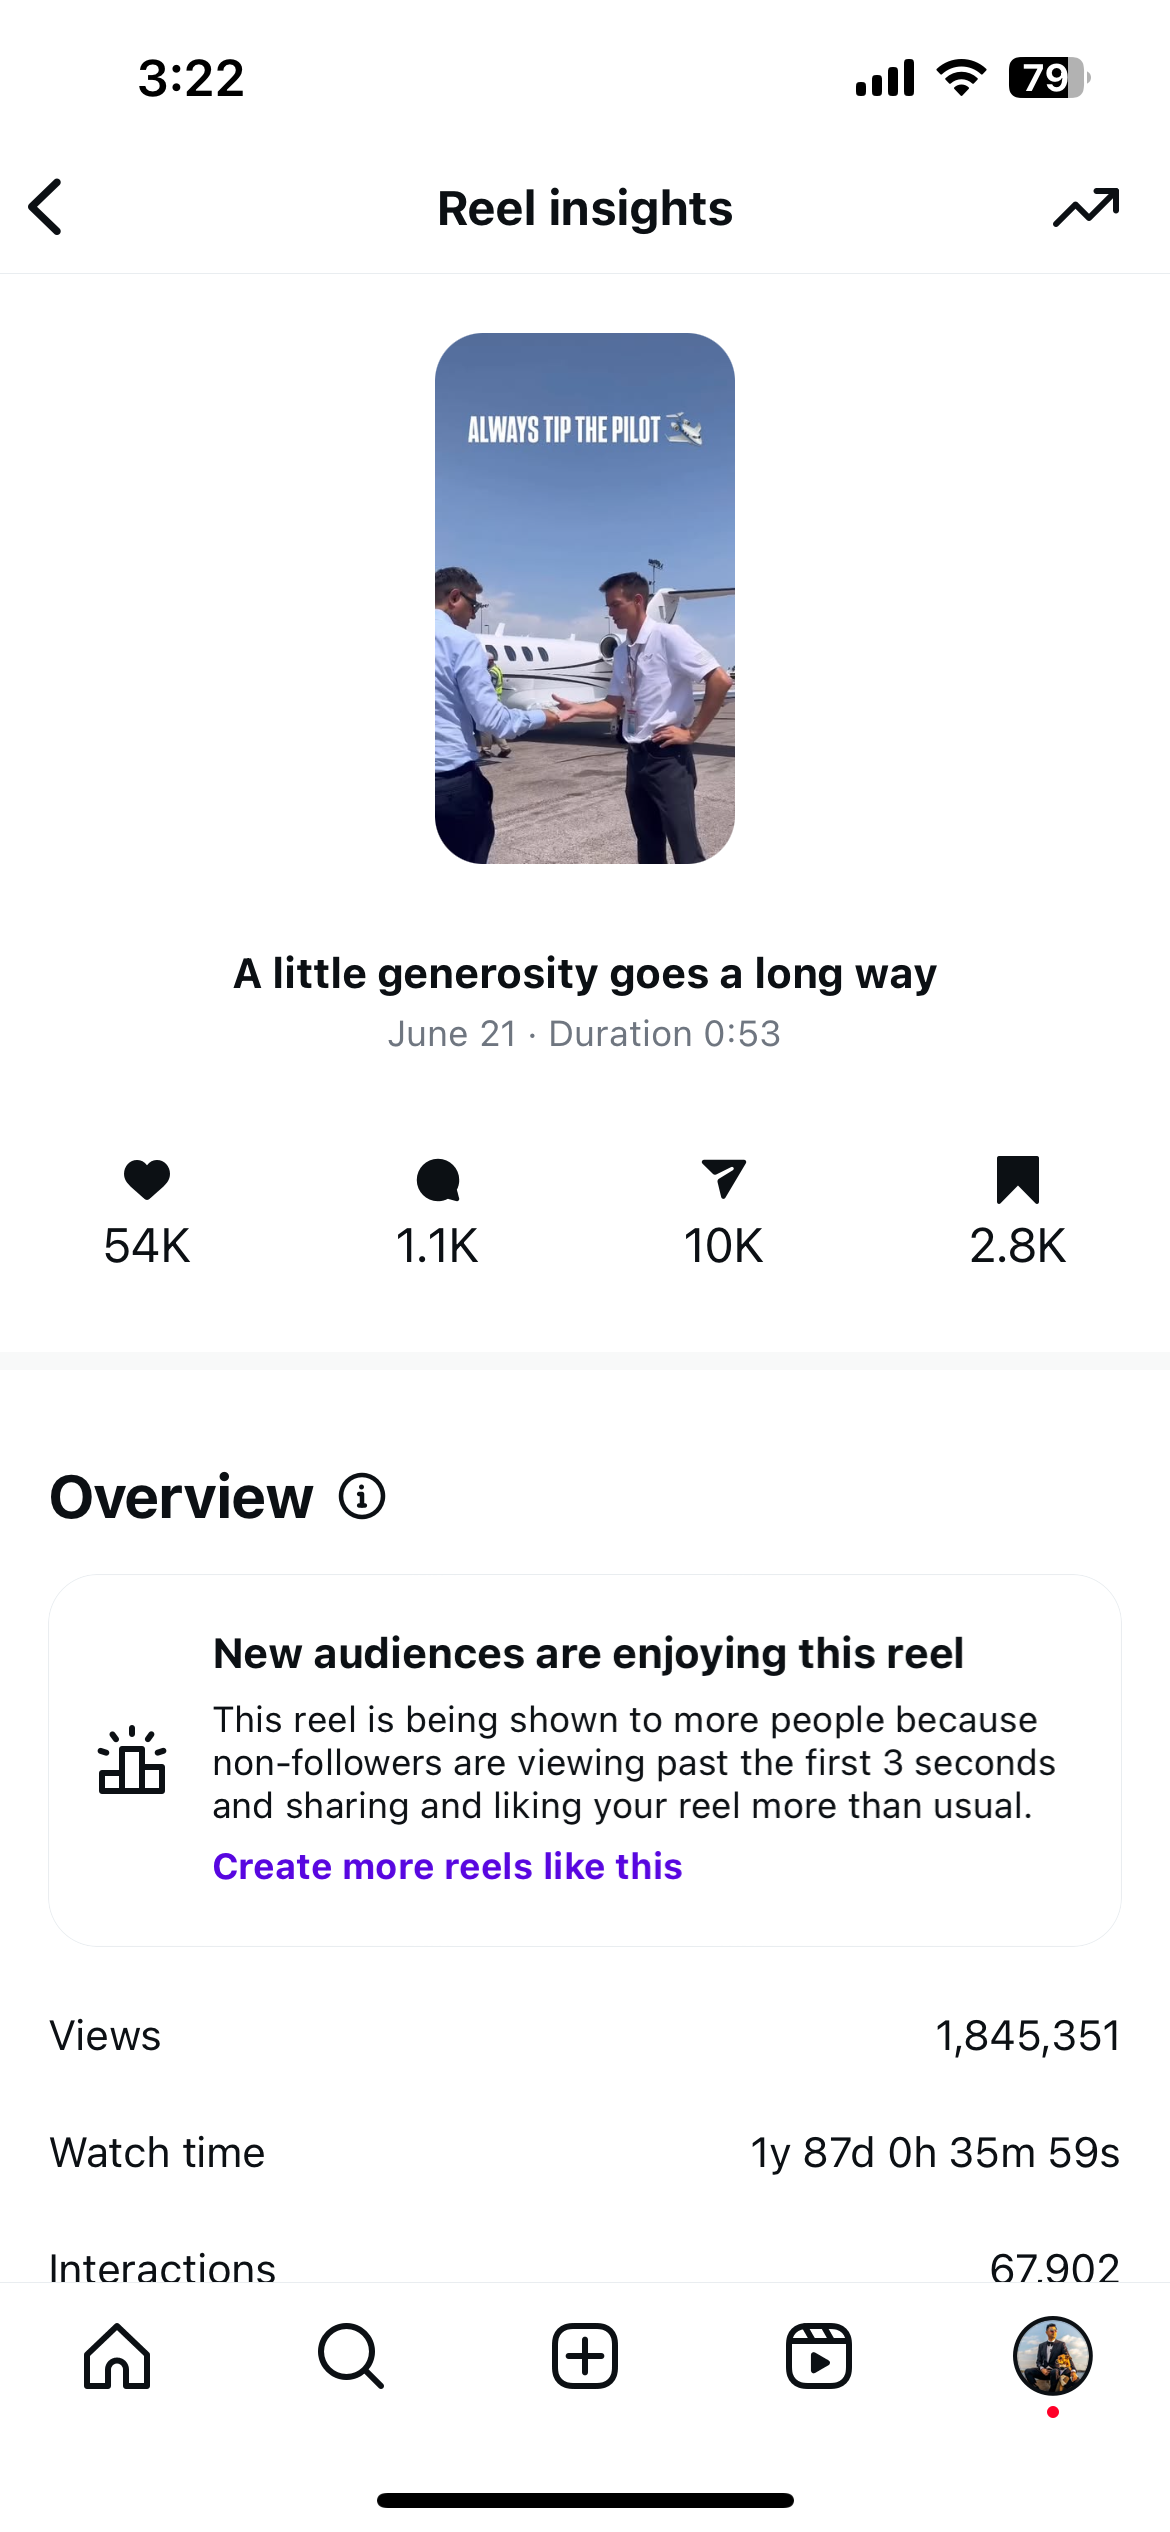
Overview: This video was initially posted to Instagram stories as part of a content testing strategy used to evaluate performance before publishing to the main feed. At the time, I had full control over story content, while feed posts required approval. By analyzing engagement across multiple story posts, I identified this clip as a clear outlier in performance.
After validating the engagement, I requested approval to publish the content as a reel. Within hours, the post significantly outperformed baseline metrics, confirming the effectiveness of using stories as a testing layer for feed content.
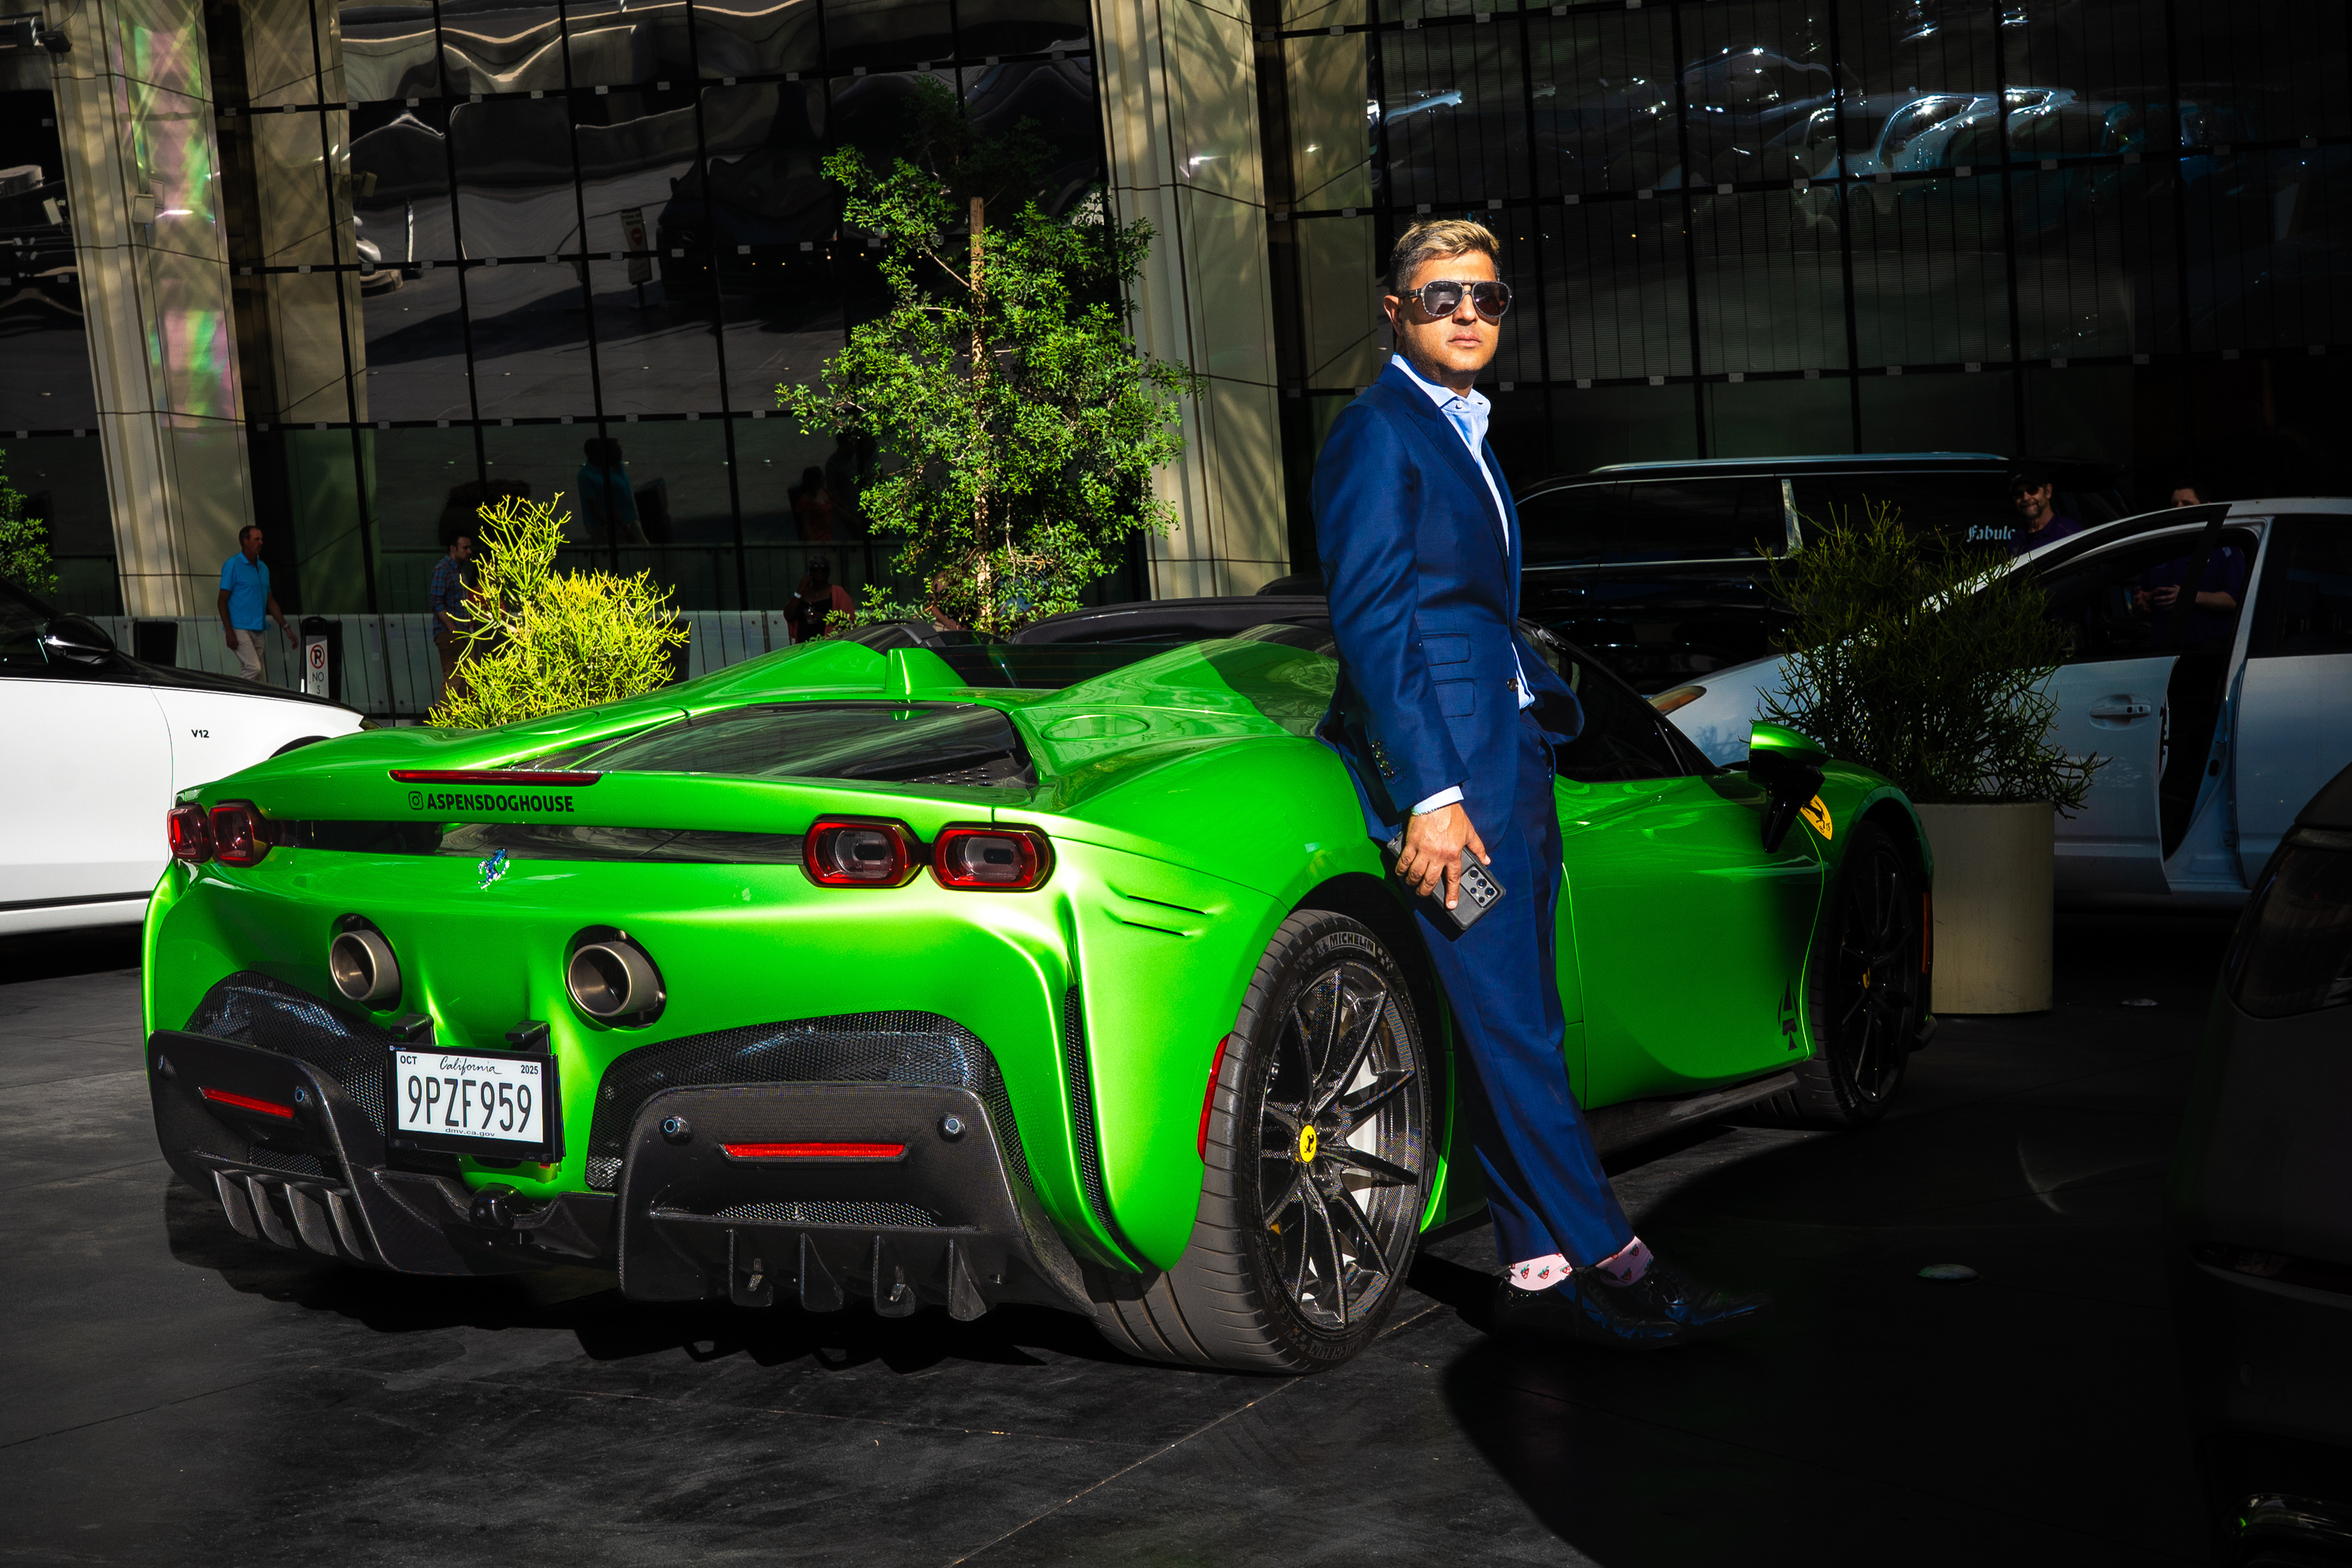
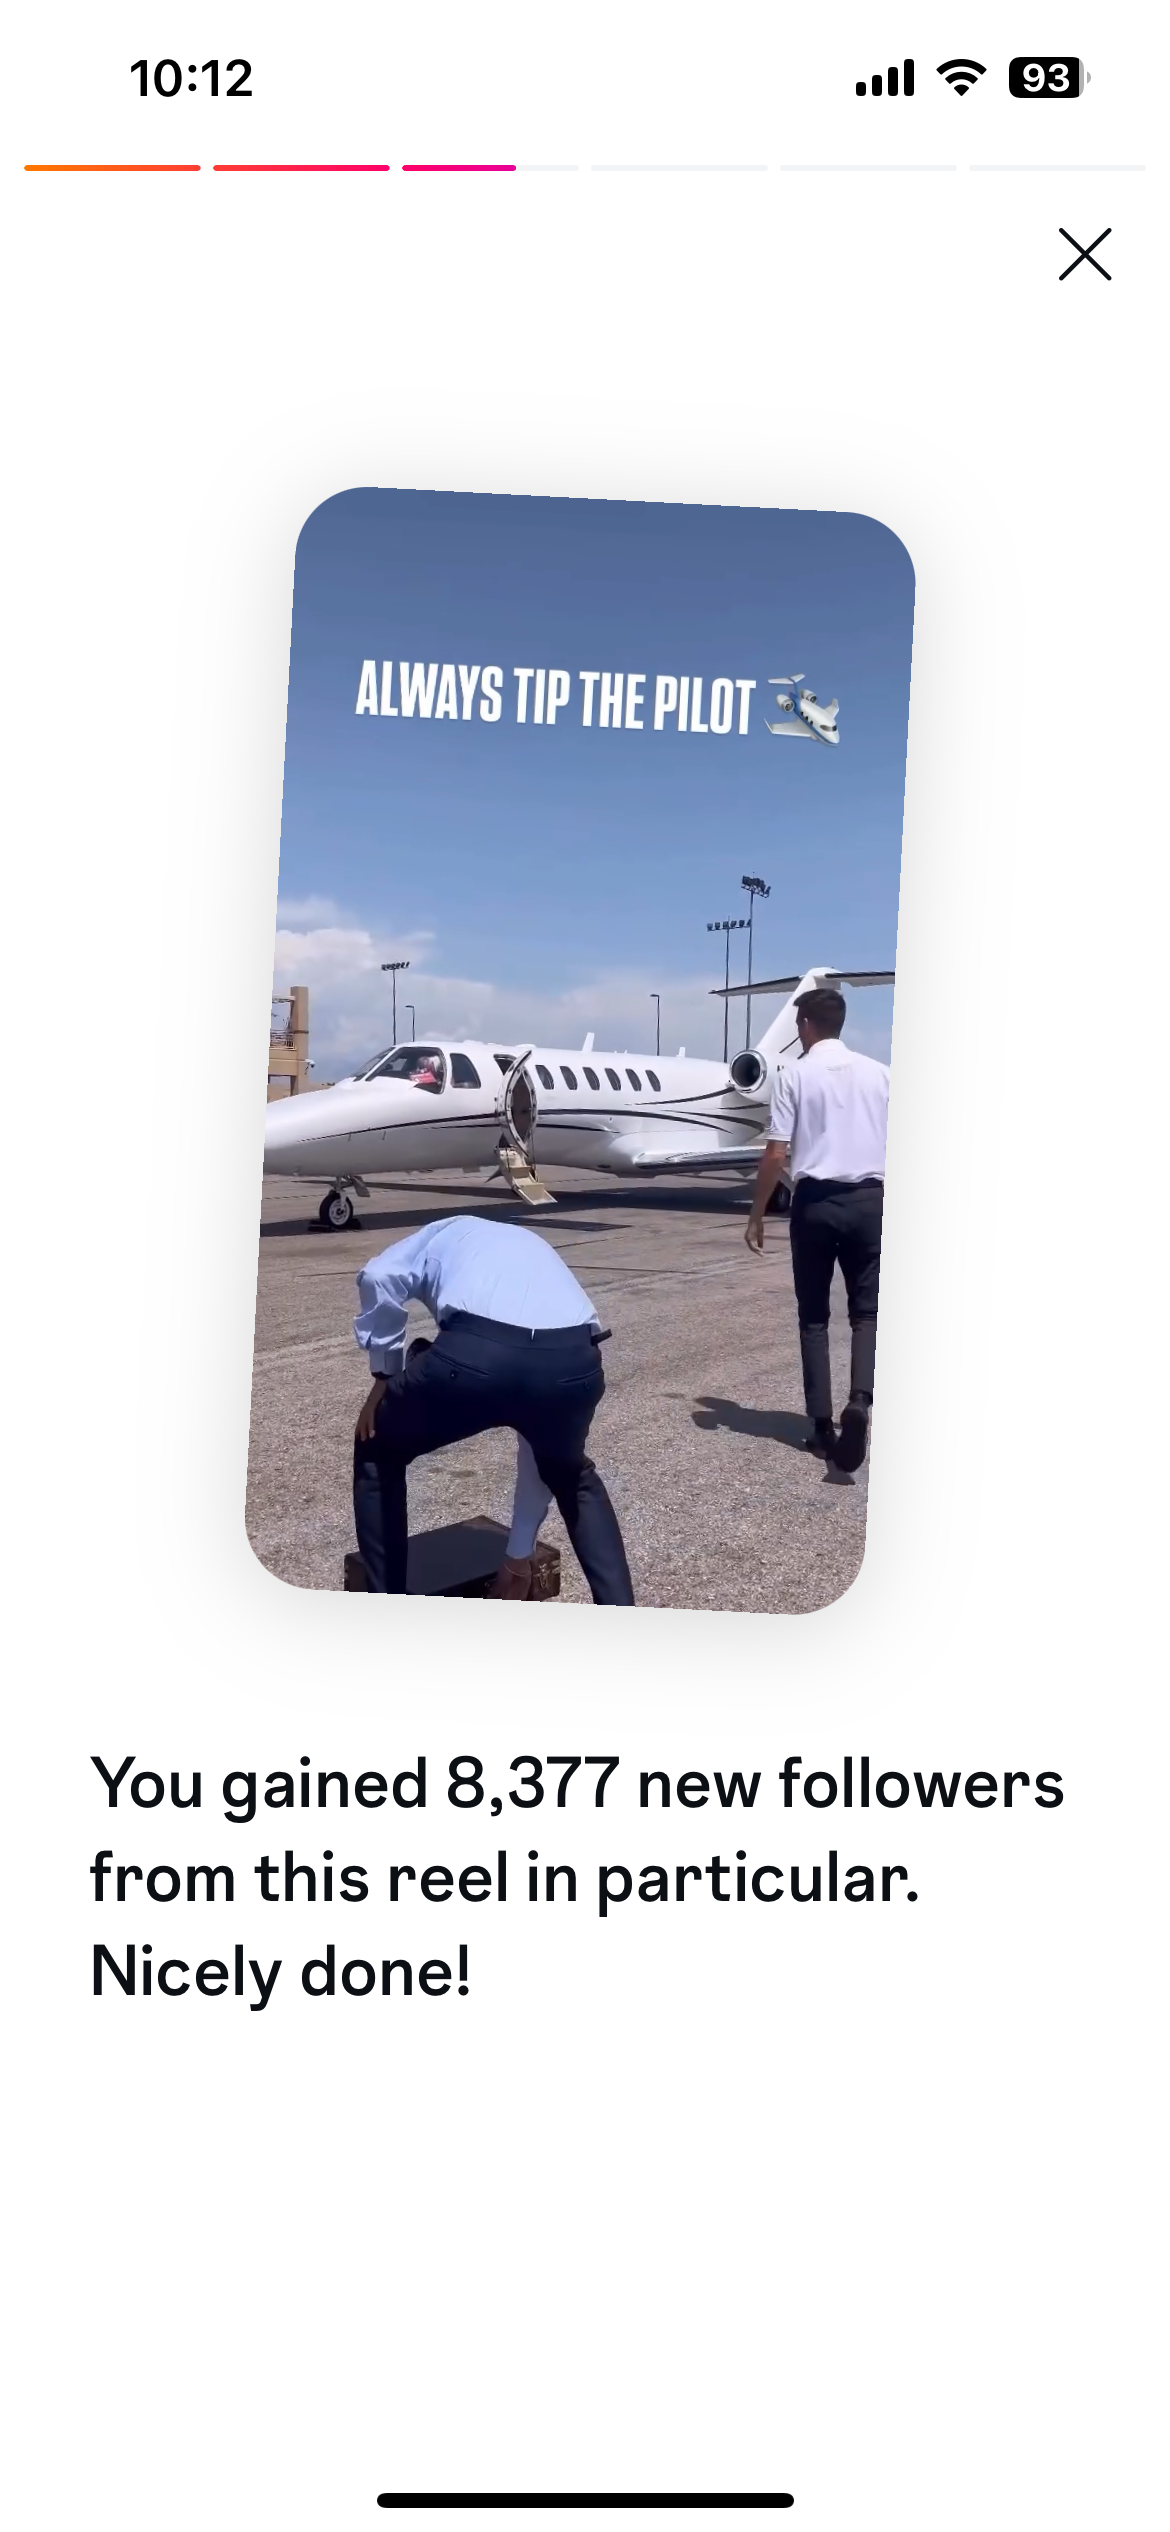
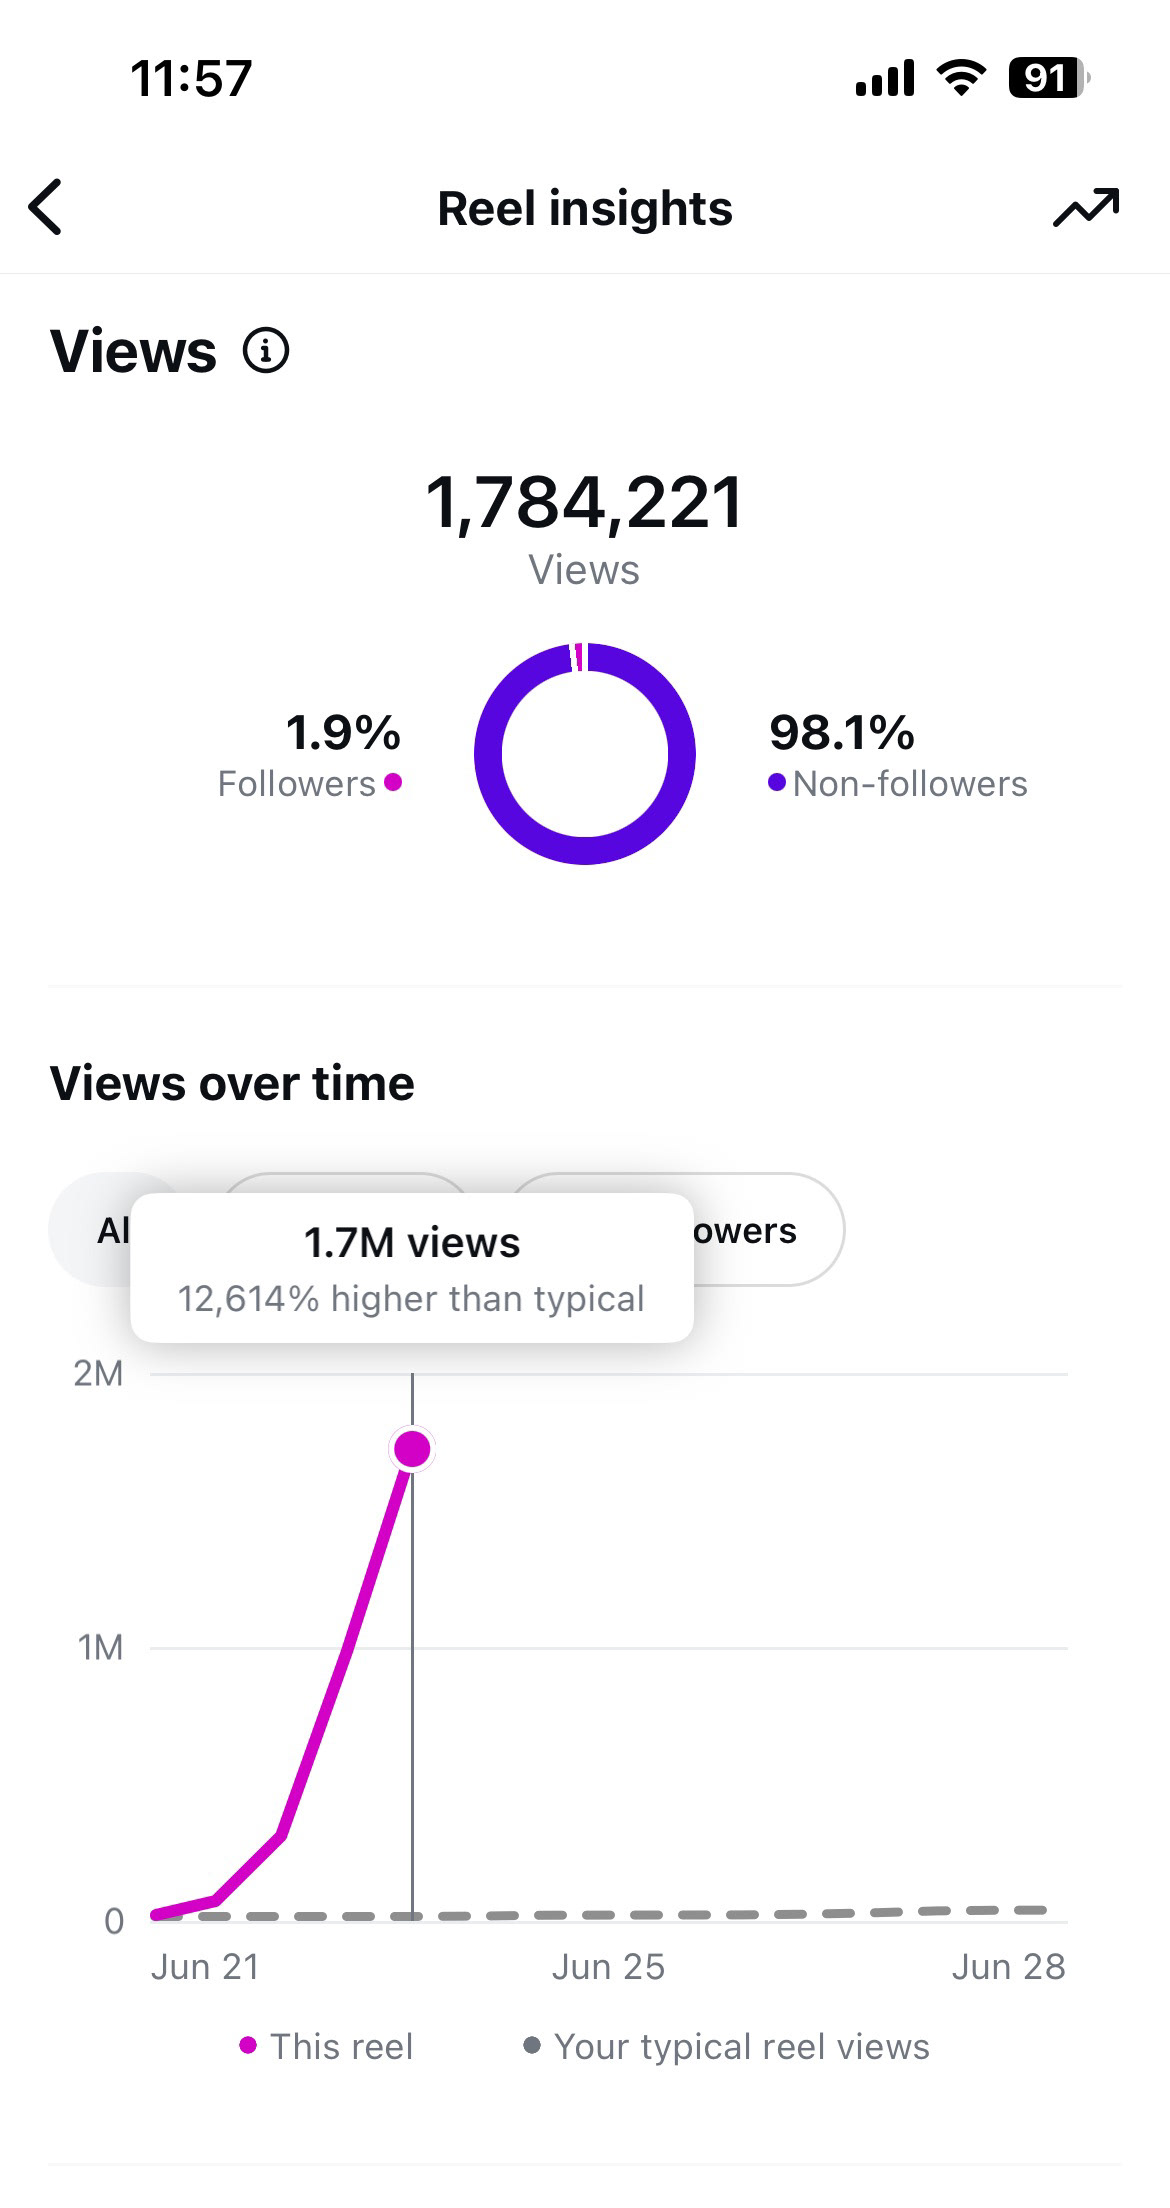
As a result, the reel generated over 5.8M+ views and 8,000+ followers, becoming the first viral post and establishing a repeatable content structure built around tipping culture.
CONVERSION EXECUTION
FROM ATTENTION TO APPLICATIONS
Overview: To drive traffic into the conversion system, I utilized Instagram’s native story features to create interactive, tap-based content designed to increase engagement and encourage clicks. Rather than relying on static office walkthroughs, I structured stories to unfold in sequence—prompting users to tap through while progressively revealing content.
This included using “tap here” interactions, layered visuals, and embedded posts, creating moments where users naturally engaged with the content and were directed to view the full post or access application links.
I also implemented a centralized BioSite to serve as the primary link-in-bio destination. Before this, there was no structured system in place—application links were only shared through temporary story posts, limiting visibility and long-term access.
I introduced a persistent conversion hub that allowed users discovering content organically to explore Ace Rogers’ brand, learn about his companies, and directly access application opportunities in one place.